

Nestled within the majestic peaks of the Japanese Alps, Mount Okhotakadake stands as a formidable icon of untamed beauty and a beckoning challenge for avid adventurers. Rising proudly to an elevation of 3,190 meters (10,466 feet), this dormant volcano offers a great hiking adventure.
I had no plans for a 3-day weekend, and I was looking for a nice weekend trip. I had heard about the Japanese Alps and decided it would be a good time to climb the 3rd tallest peak in Japan. Although not as tall Mt. Fuji, it can be a great alternative if you want to avoid the crowds. Here is how you can successfully hike Mount Okuhotaka.
Trevorocity is reader-supported. When you buy through links on this site, we may earn an affiliate commission.
How to Get to Mount Okuhotaka
The easiest way to Mount Okuhotaka is by taking a direct bus to the Kamikochi Bus Station. This bus has a direct route from both Osaka and Shinjuku. The best bus to take is overnight as it leaves around 10:30 PM and gets in the following day at around 5:30 am. This is a very popular bus and sells out far in advance.
If you are unlucky like me and not able to get a direct bus ticket, don’t worry. There are still options in getting there, it just takes a bit longer. I’d recommend getting the Kamikochi Yu Yu ticket. Although it is a longer trip, it is about half the price of which the direct bus would cost.
The Kamikochi Yu Yu ticket includes a round-trip from Shinjuku to Matsumoto by bus (3.5 hours), a railway from Matsumoto to Shinshimashima (30 minutes), and finally a bus from Shinshimashima to Kamikochi (1 hour). To best maximize this ticket, I recommend leaving the night before and taking the first train out of Matsumoto to Shinshimashima.

What are Mountain Huts in Japan?
In Japan, a mountain hut, known as “sanso” in Japanese, is a rustic yet essential refuge nestled in mountainous regions. These huts serve as vital waystations for hikers and climbers tackling the peaks, offering a temporary haven amidst the challenging terrain. Typically constructed from wood and designed to withstand the harsh mountain weather, these huts provide a range of amenities, including basic sleeping quarters, communal dining areas, and sometimes even hot meals.
Climbing Mount Okuhotaka - A Hiking Guide
How Much Does It Cost to Hike Mount Okuhotaka?
There are no admission fees for hiking Mount Okuhotaka. The only fees for hiking Mount Okuhotaka are the transportation to Kamikochi, mountain hut, gear, and food. For my trip it cost me just under $150 USD for all of the above.
The Best Time to Hike Mount Okuhotaka
The weather will be best in the summer months of July and August. While this might be the best weather, it is also peak climbing season. There will be no snow and the trail will be in great condition. Reservations for mountain huts will be filled up fast, so make sure to make your reservation early.
I went at the start of November (the last weekend the park would be open) and to me it was perfect. The shoulder seasons of spring and fall have less predictable weather and usually snow on the mountain. However, this means less people. I encountered only a handful of other hikes during my weekend.
It is important to note that the opening and closing of Kamikochi changes every year. The official website will show opening and closing dates. It also will provide any other weather emergencies such as rain or thunderstorms.

How Many Days to Climb Mount Okuhotaka
Kamikochi Bus terminal to the top of Mount Okuhotaka is about 24 miles round trip (if you believe AllTrails). My recommendation is to make this a 2-day trip. The first day making the hike up to a mountain hut and the second day making the ascent and returning to Kamikochi. There is a more detailed description below.
Register Your Hike
I think one thing that a lot of foreign visitors don’t realize is that it is actually required to register your hike and failing to do so can end up with a fine. Now, I can’t comment on how often this happens. I met two other foreign hikers and neither of them had registered their itineraries and had never even heard of it.
There are a few different ways to register your hiking itinerary. This can be done by mail, in-person, or online. Although the online version is only in Japanese Google Translate will easily translate the page and I found this the easiest. Registering online can be done through this website.
If you’d prefer to submit your itinerary by mail or in-person this website has the PDF to fill out. It also provides the mailing address and locations of post boxes at trailheads to place the form.
What Gear do I need for Mount Okuhotaka
Japan has been one of my favorite countries for backpacking because mountain huts remove the need for all the heavy gear. That being said I would still recommend a 30L pack to bring with you on a hike up Mount Okuhotaka with the following items.
- Helmet – A helmet is recommended when hiking because of how loose the rocks are and they tend to fall easily. Some mountain huts rent these for about 1,000 Yen and allow you to return them at Komikochi visitor center.
- Layers – Dressing in layers is key. While the base area of Kamikochi can get pretty hot, when you gain elevation it becomes colder. Especially in the evening and early morning.
- Hiking Boots/Shoes – A good pair of hiking shoes will make this trip much more enjoyable. It is best if they are already broken in.
- Head Lamp – A head lamp is essential for the early morning ascent to the mountain top.
- Snacks – While mountain huts usually offer snacks to buy, it is best to make sure that you have some with you in case you get hungry on the trail.
- First Aid Kit – A small hiking first aid kit is always handy to carry. Hopefully you’ll never need it, but it is better to be prepared.
- Toiletries – Pack travel size toiletries including medication and a small portion of toilet paper.
- Crampons (winter) – If you plan on hiking in the winter crampons are essential, otherwise you will not be able to make it to the summit. Many stores in central Tokyo rent camping gear if you do not want to buy your own pair.
- Cash – Mountain huts rarely take any sort of card payment. Cash is key here, especially coins for the vending machines.
Climbing Mount Okuhotaka - An Itinerary
Day 1 - The Ascent
Getting an early start is important, you can beat the heater and day hikers the earlier you start. If you are coming from Shinjuku on the overnight bus, you will probably arrive around 6:00 am. Coming from Matsumoto, you will probably be arriving by 8:15 am. Finally, if you are coming by Matsumoto, remember it is required to pick up a reserved ticket back, which is done at Kamikochi. Do this before starting the hike.
The hike today will be about 8.4 miles long with an elevation gain of about 3,200 feet. The first 5 miles of the day are relatively flat with great views of the surrounding mountains. There will be a bunch of day hikers out in these first few miles.

Eventually you will come to a giant bridge at Yoko, this is a great area to have a small rest. Once you cross this bridge the next few miles have some crazy elevation gains. After crossing the bridge there was some construction going on, so I had to take a small detour.
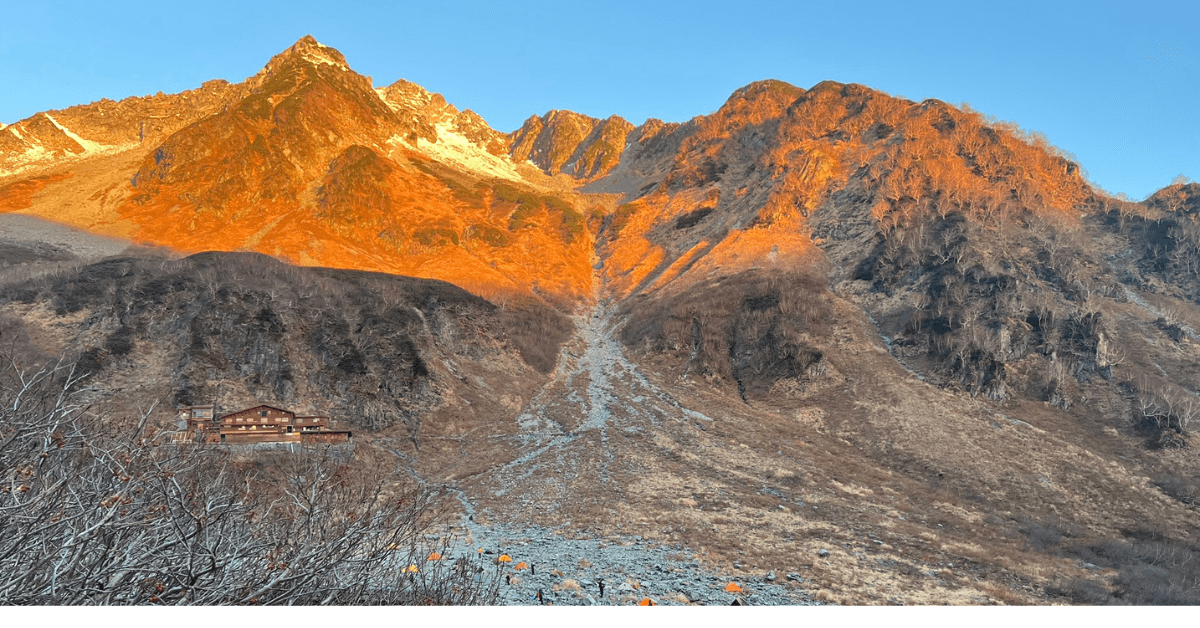
It will be climbing on rocks and over streams for about the next 3 miles until you reach the mountain huts. There are two different options in the valley before Mount Okuhotaka. The Karasawa Hut and the Karasawa Hutte stand distinctively apart, their names making it nearly impossible to confuse the two (sarcasam). While both offer the same style accommodations I stayed at Karasawa Hutte. It took me a total of 3 hours and 30 minutes to reach the mountain hut.
It was the last weekend that this mountain hut was going to be open, so accommodations were a bit limited. However, they offer a drying room, a nice place to sleep, Wi-Fi, and meals at an additional cost. I had brought my own breakfasts, so I opted for only dinner. Once I had arrived at the summit, I relaxed, had some lunch and explored the area. In the summer, colorful tents dot the valley, creating a vibrant tapestry that resembles a flower field from a distance.
Sunset came pretty fast this late in the year, so I headed in for dinner. It was still relatively early, but I knew I was going to have an early morning. I went to my little cubicle and made my bed, watched a bit of Netflix and fell asleep.

Day 2 - Summit and Descent
Another early morning, I was out on the trail by 6:00 am after eating breakfast I had already packed. If you thought the elevation was difficult yesterday, you’re in for a long day. While a much shorter ascent at only 3 miles, it comes along with 2,500 feet of elevation gain.
Leaving from the hut there is a path marked by rocks painted with a circle on them. Follow these for about 0.5 miles until you reach the base of the steepest part of the hike. Depending upon the season you will either just climb up the snow or follow the ridge line which will have ladders. After you hike an additional 2 miles you will reach another mountain hut. This is a great place to take a rest.

Finally it is time to make the last push and climb to the top. From the mountain hut you will head south and see a steep incline followed by ladders. This area can be kind of sketchy to climb, so in the winter months be especially careful. It was about an additional 0.5 miles and I had finally reached the summit of the 3rd highest mountain in Japan.
From here it was time to turn around and head back down to the Kamikochi bus terminal. This being an out and back I just followed the path that I had taken all the way up. Although almost a 12 mile descent it was pretty easy, but I highly recommend hiking poles if you have them.
I made it back with time to spare and as soon as I got on that bus I was exhausted and it was time for a nap on my return trip to Shinjuku.
Final thoughts on Mount Okuhotaka
As the sun sets behind the jagged peaks of the Northern Japanese Alps, casting a warm glow over the vast expanse below, you find yourself standing triumphant at the summit of Mount Okuhotaka. The journey from Komikochi, through the challenging Karasawa Trail, and up to this lofty peak has been nothing short of an odyssey—one marked by perseverance, breathtaking vistas, and the unyielding spirit of adventure.
While it might not be as tall as Mt. Fuji, it still offers a good 2 day hike and usually with less people.


[…] A Beginners Guide to Hiking Mount Okuhotaka […]
[…] A Beginners Guide to Hiking Mount Okuhotaka […]