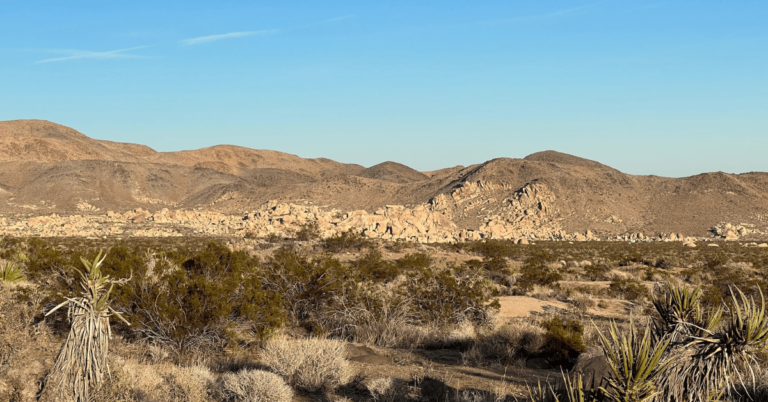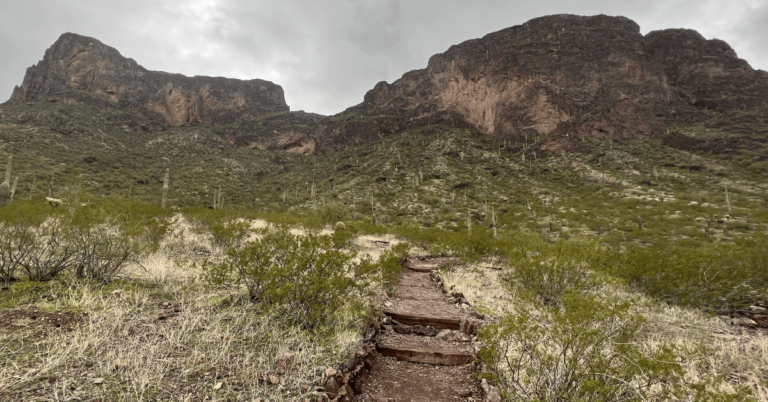
Nestled amid the stark beauty of the Mojave and Colorado Deserts, Joshua Tree National Park is a testament to nature’s artistry and resilience. Backpacking here is a great way to explore the park while leaving the day-trip crowds behind. This beginner’s guide covers everything you need — insights, tips, and essential knowledge — to make your trip as rewarding as the landscape itself.
Trevorocity is reader-supported. When you buy through links on this site, we may earn an affiliate commission.
Getting to Joshua Tree National Park
Palm Springs International Airport is the closest airport to the park, though it has fairly limited flights — American Airlines is the most common carrier serving it. Most visitors end up flying into other, better-connected airports (like LAX or Ontario) and driving in instead.
When Is the Best Time to Backpack Joshua Tree?
While Joshua Tree is open year-round, there are clearly better and worse windows for backpacking specifically. Spring and fall are ideal; most people avoid winter and summer due to weather extremes.
Fall (October–November)
Milder temperatures, roughly 70–90°F, with cooler nights and noticeably fewer crowds. I backpacked here myself in mid-November — the days ran a little warm, but the nights were incredible.
Spring (March–May)
Favorite for many, with daytime temps averaging 75–85°F, plus the park’s famous wildflower blooms, typically peaking in late March to early April.
Winter and summer
Fine for a day visit, but not for backpacking. Winter days are comfortable, but temperatures drop below freezing fast after dark. Summer flips that entirely, with daytime highs regularly hitting the 100s.
Backpacking in Joshua Tree National Park

Entrance and Permit Costs
Before you go, budget for two separate fees. The park entrance fee is $30 per vehicle, covering everyone in the car for 7 consecutive days — an America the Beautiful annual pass ($80) covers this if you visit multiple parks in a year. Separately, overnight backcountry stays require a backpacking permit, which costs $6 flat and covers a group of 1–12 people for up to 14 nights.
Permits can be purchased three ways:
- Online at recreation.gov — the easiest option
- By phone through the recreation.gov reservation line
- In person at the permit office, ideal for last-minute trips
Permits are bookable up to 6 months in advance. Most zones have no cap on the number of permits issued, but holiday weekends get busy fast, and designated campgrounds fill quickly.
Where to Backpack in Joshua Tree National Park
The park is divided into 15 backcountry zones. All have something to offer, but a few stand out:
Boy Scout Trail draws the largest mix of day hikers and backpackers for its variety of scenery — from the famous Joshua trees to the Wonderland of Rocks. Even without a permit for this zone, it’s worth doing as a day hike. Note: this is the one zone where you must camp at a designated backpacking campground rather than camping at-large.
Twin Tanks, Lost Horse, and Pine City are all centrally located, meaning you can see a lot without too much driving between trailheads. These areas see plenty of day hikers, but traffic clears out fast once afternoon hits.

2-Day Backpacking Sample Itinerary in Joshua Tree National Park
Backpacking offers real freedom, but that same freedom can make planning tricky. Here’s a sample itinerary from one of my own trips — use it as a direct guide or just as inspiration for areas worth visiting.
Day 1 – Backpacking Joshua Tree National Park
I was driving from Phoenix to Los Angeles to visit a friend and decided to extend the trip by a few days for a short backpacking run through Joshua Tree. Admittedly, I planned this one the day before I left.
I wanted something relaxing — not a huge mileage trip — so I settled on the Lost Horse Zone since it’s central. That let me enter through the south entrance and exit through the west, continuing on to LA afterward. I booked my permit on recreation.gov the day before.
Coming in through the south entrance, my first stop was Lost Palms Oasis — genuinely one of my favorite hikes in the park. It’s remarkable how these giant trees grow out of such a barren landscape. It’s a long hike (about 7.4 miles round trip), so I only did about half before heading back to the car.
I made a quick stop at the visitor center (yes, I’m the guy who collects the sticker) and checked in with a ranger, just to confirm my plan, though it wasn’t required. From there, I drove up the road with one more stop at the Cholla Garden before reaching the trailhead.
I started unpacking around midday — November temperatures were perfect. This was also my first trip testing the hiking features on my new Apple Watch Ultra. I hiked just over 2.5 miles before finding a good campsite.
The rest of the afternoon was for relaxing, then dinner as the sun went down. The best part of backpacking in Joshua Tree? The stargazing. Light pollution is minimal out here, making it one of the best places around for a clear night sky.

Day 2 – Backpacking Joshua Tree National Park
No rush to get moving — I stayed in my sleeping bag a while. It gets cold overnight in the desert once the sun’s down. As the sun came up and I warmed up, I made a quick breakfast and packed up.
Hiking out, I only passed one other hiker. Back at the car, I continued toward the west exit, making a few more stops along the way, same as the day before.
I stopped at Jumbo Rocks and Elephant Rock — a bit out of the way, but this specific spot is actually what got me into backpacking in the first place. The campground here is always full, so I’ve had to find other ways to camp nearby over the years. I spent about an hour just exploring.
Last stop: Hemingway, an area known for its rock formations. Quick lunch, watched a few climbers heading out, then made my way to the west entrance and continued the drive to LA.
Tips for Backpacking in Joshua Tree National Park
- Bring your America the Beautiful Pass if you have one — free park access pays for itself fast if you’re visiting multiple parks this year.
- Campsites must sit at least 1 mile from any backcountry trailhead, ½ mile from any road, and 200 feet from any trail.
- As long as you follow those rules, you can camp anywhere suitable (avoiding historical sites and ruins) — except Boy Scout Trail, where camping is restricted to designated backpacking campgrounds.
- Caching food and water is allowed, with rules: label water containers with your name, phone number, and pickup date; store food in a hard-sided container like a bear vault to protect wildlife.
- No campfires in the backcountry. Small butane cooking stoves are the only open flame permitted.
Final Thoughts: Backpacking in Joshua Tree National Park
Backpacking in Joshua Tree opens a gateway to a landscape of unmatched beauty, tranquility, and wonder — from the iconic Joshua trees standing sentinel across the desert to the stars overhead at night. Every moment here is a reminder of how connected we are to the natural world.
Whether this is your first backpacking trip or the continuation of a lifelong habit, Joshua Tree is ready to show you what it’s got.